You have a logo. You want it stitched onto hats, shirts, or jackets. But your embroidery machine cannot read a JPEG or PNG file. It needs special instructions. That is where embroidery digitizing comes in.
This guide walks you through how embroidery digitizing works. You will learn what digitizing means, why it matters, and how the embroidery digitizing process turns your artwork into stitches machines can sew.
Quick Summary: What Is Digitizing?
Embroidery digitizing is the process of turning a picture or logo into a set of machine instructions. A trained digitizer opens your artwork in specialized software and manually programs every stitch, the type, the angle, the density, and the color order. The finished file is commonly saved as DST, PES, or EXP. gives your embroidery machine an exact roadmap to follow, stitch by stitch.
Think of it as teaching your machine how to draw your design using thread instead of ink.
What Is Embroidery Digitizing?
Embroidery digitizing is not graphic design. A graphic designer makes an image look good on a screen. A digitizer makes an image sew correctly on fabric.
When you hand a logo to a digitizer, they do not just shrink it to fit. They reconstruct it from the ground up, deciding how each section will be sewn. They choose where to use raised satin columns, where to lay down flat fill patterns, and where to use thin running lines for small details. They also control how tightly the stitches pack together so the design does not pucker or look bare.
Fabric matters just as much as the artwork. A file built for a thick terry towel will sew differently than one built for a lightweight polo. That is why skill matters. An experienced digitizer tweaks the settings so the file runs cleanly on your machine and the final piece looks sharp.
At TriStarEmb, we have been building embroidery files since 2011. Our files are designed to cut down on thread changes, keep the machine running without stops, and deliver results that last.
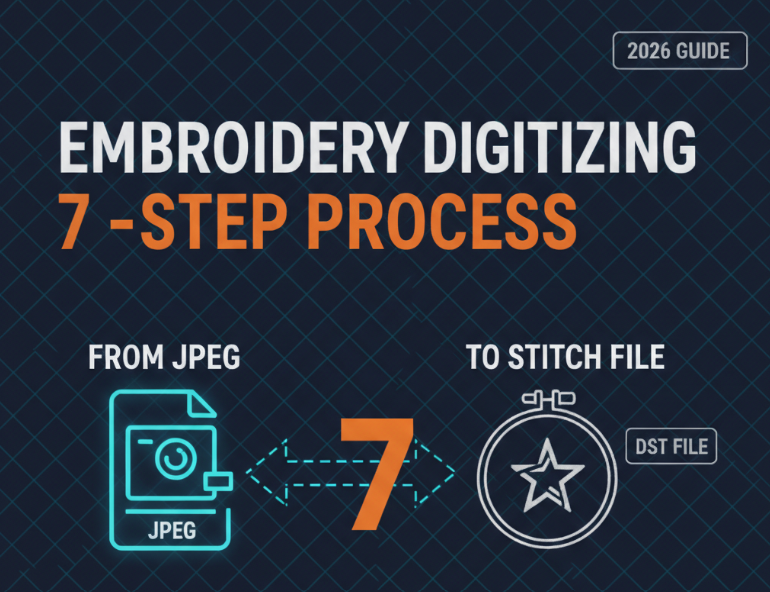
How Does the Embroidery Digitizing Process Work?
The embroidery digitizing process moves through seven clear stages from artwork to stitch-ready file.
Step 1: Analyze the Artwork
The digitizer begins by studying your original image. They look at complexity, thread colors, size, and fabric type. A basic two-color left chest logo takes far less work than a detailed jacket back with shading and small lettering.
This review shapes the entire plan. A sharp digitizer catches red flags early, such as text too small to sew cleanly or color transitions that will not translate well to thread.
Step 2: Import the Image into Digitizing Software
The digitizer loads your artwork into a professional program like Wilcom, Pulse, or Hatch. These tools let the digitizer trace shapes, assign stitch properties, and build the file from scratch.
The program does not magically turn your image into stitches. The digitizer must manually outline each shape, pick the stitch direction, and match thread colors. This hands-on work separates a file that sews perfectly from one that snaps threads or drifts out of alignment.
Step 3: Set the Stitch Types
Every section of a design gets its own stitch style.
Satin stitches are ideal for letters, borders, and slim shapes. They sit slightly raised and give a smooth, glossy finish.
Fill stitches (tatami) cover broad areas. The digitizer sets the row angle and spacing so the surface looks uniform and does not wrinkle.
Running stitches are thin single lines used for outlines, small details, and foundation layers underneath the main stitches.
Specialty stitches such as motif or cross-stitch patterns add texture when needed.
The digitizer also builds an underlay layer. These hidden stitches anchor the fabric to the stabilizer and create a base for the top stitches to sit on. Skip this step, and the design can shift, sink, or lose its crisp edges.
Step 4: Map the Stitch Sequence
The order in which the machine sews each part matters. The digitizer arranges the sequence to limit color swaps, reduce loose jump threads, and keep everything registered.
For instance, if red thread appears in three spots, the digitizer may sew all three red sections back-to-back. This keeps the machine from stopping to change colors over and over. Good sequencing also trims down production time, especially on multi-head machines.
Step 5: Set Density and Pull Compensation
Density sets how close the stitches are packed. Pack them too tight, and the fabric bunches up. Leave them too loose, and the garment shows through underneath.
Pull compensation fixes a hidden problem: fabric distorts when thousands of needle punctures pull it inward. Stretchy knits pull more than stiff canvas. The digitizer slightly oversizes elements in the file so that after the fabric pulls, the sewn result matches the original artwork.
Step 6: Create the Machine File
When the digitizer is satisfied, they export the design into a format the machine can read. Common formats include:
Before sending it out, the digitizer runs the file through a software simulator. This preview catches problems like missing stitches or wrong color order. Some shops also sew a physical sample on scrap fabric to double-check the result.
Step 7: Deliver the File
The completed file is delivered with notes on thread colors, total stitch count, and any special sewing tips. At TriStarEmb, we include a digital proof so you can preview the layout before it ever touches a machine.
Why Does Digitizing Quality Matter?
A bad file creates real headaches. Snapped threads slow down production and waste supplies. Poor registration makes the design look sloppy. Overly dense stitching can break needles or tear delicate fabric.
A well-built file pays for itself. It keeps the machine humming, uses thread efficiently, and gives you a clean finished product. Your customers can tell the difference between a logo that looks sharp and one that seems off.
That is why many shops prefer to send digitizing to specialists instead of handling it in-house with limited training. A seasoned digitizer brings years of hands-on knowledge and software skill that are tough to replicate overnight.
How Long Does Digitizing Take?
Speed depends on how complex the design is. A straightforward left chest logo may be done in a few hours. A busy jacket back with many colors and fine details can take a full day.
Rush jobs are possible, but cutting corners hurts quality. At TriStarEmb, we pair quick turnaround with careful workmanship. Most standard orders are ready within 24 hours.
How Much Does Embroidery Digitizing Cost?
Cost depends on design size, complexity, color count, turnaround time, and special techniques like 3D puff or applique. Simple logos cost less. Intricate, multi-color designs with small text or gradients cost more because they demand extra time and skill.
Check our pricing for a full breakdown, or send us a quote request with your artwork and we will give you an exact price.
Common Mistakes Beginners Make
New to embroidery? Avoid these pitfalls when ordering digitizing.
Sending low-resolution images. Grainy artwork makes it hard for the digitizer to capture fine details. Always send the clearest file you have.
Forgetting to mention fabric type. Tell your digitizer what garment you are using. A file tuned for denim will sew poorly on silk.
Expecting a perfect photo copy. Embroidery uses thread, not ink. Photo-realistic gradients are hard to recreate with standard stitches.
Picking the cheapest bid. Bargain digitizing often means rushed work or inexperienced hands. A bad file costs more in ruined garments and lost machine time.
Skipping the sew-out proof. A digital preview shows layout. A physical sew-out shows reality. Ask for both.
FAQ: Embroidery Digitizing for Beginners
What file formats can I send for digitizing?
JPG, PNG, PDF, AI, EPS, and even hand-drawn sketches are all acceptable. Vector files (AI, EPS, PDF) are best because they stay sharp at any size. A high-resolution raster image will also work.
What file format will I receive?
You get the format your specific machine reads. The most common ones are DST, PES, EXP, JEF, and VP3. If you do not know which one you need, tell us your machine brand and model and we will send the right file.
Can any image be digitized?
Most can, but some are harder. Very small text, extreme detail, and photo-realistic images are tricky. A skilled digitizer will tell you what will sew well and what may need to be simplified.
What is the difference between digitizing and vector art?
Digitizing produces a stitch file for embroidery machines. Vector art produces a scalable graphic for print, vinyl cutting, or screen printing. They are two different outputs. At TriStarEmb, we provide both digitizing services and raster to vector conversion.
Do I need to own digitizing software?
No. You send us your artwork and we handle the rest. You only need your embroidery machine and the stitch file we deliver.
How do I know if my digitized file is good quality?
A solid file sews cleanly without constant thread breaks. The stitches line up properly. The design looks crisp on the fabric, not warped or bunched. When in doubt, ask for a sew-out sample before you run a full batch.
Key Takeaways
Embroidery digitizing turns artwork into a stitch file your machine can read.
The process includes reviewing artwork, selecting stitch styles, planning the sewing order, and adjusting density.
Fabric type, design size, and detail level all change how a file is built.
A well-digitized file saves time, prevents thread breaks, and gives professional results.
Always send clear artwork and tell your digitizer what fabric you are using.
Experienced digitizers bring know-how that basic software alone cannot replace.
WRAP UP
Embroidery digitizing is the missing link between your design idea and the finished stitched product. Without a proper digitized file, your machine has no idea what to sew. With one, your logos, names, and graphics become real, thread-by-thread.
The embroidery digitizing process demands skill, care, and the right tools. A strong digitizer does far more than trace your image. They engineer every stitch path so the design sews cleanly, looks sharp, and stays intact after repeated wear and washing.
If you are ready to get your design digitized, the team at TriStarEmb is here for you. We have been producing embroidery files since 2011, and we understand how to make your designs look outstanding on any material.
https://tristaremb.com/send-quote/